
Recently, when for lack of better offers I watched the German quiz show “Wer weiß denn sowas” on TV, I got the confirmation of one of my convictions – that the hover is by far the most effective abdominal exercise.
You want a six-pack?
Do the hover and you will definitely have the best chance to reach your goal. Since we are on the subject – not everyone can get a six-pack, because it is primarily the number of intermediate tendons running horizontally over the straight abdominal muscle that form the so-called “packs“. The number of these tendons varies from person to person between zero and four (most of us having two or three or them) – ergo, some of us will never develop a six-pack. No matter if the tendons are present or not, a good core training is indispensable and so we now come back to our hover.
Doing a hover, we not only train the abdomen, as in crunches, for example, but our entire core: If you do it right, the thighs, booty, abdomen and even the back and shoulders are under tension. For this reason, this great functional exercise is also an excellent quick warm-up before any workout.
So what do you have to watch out for when hovering?
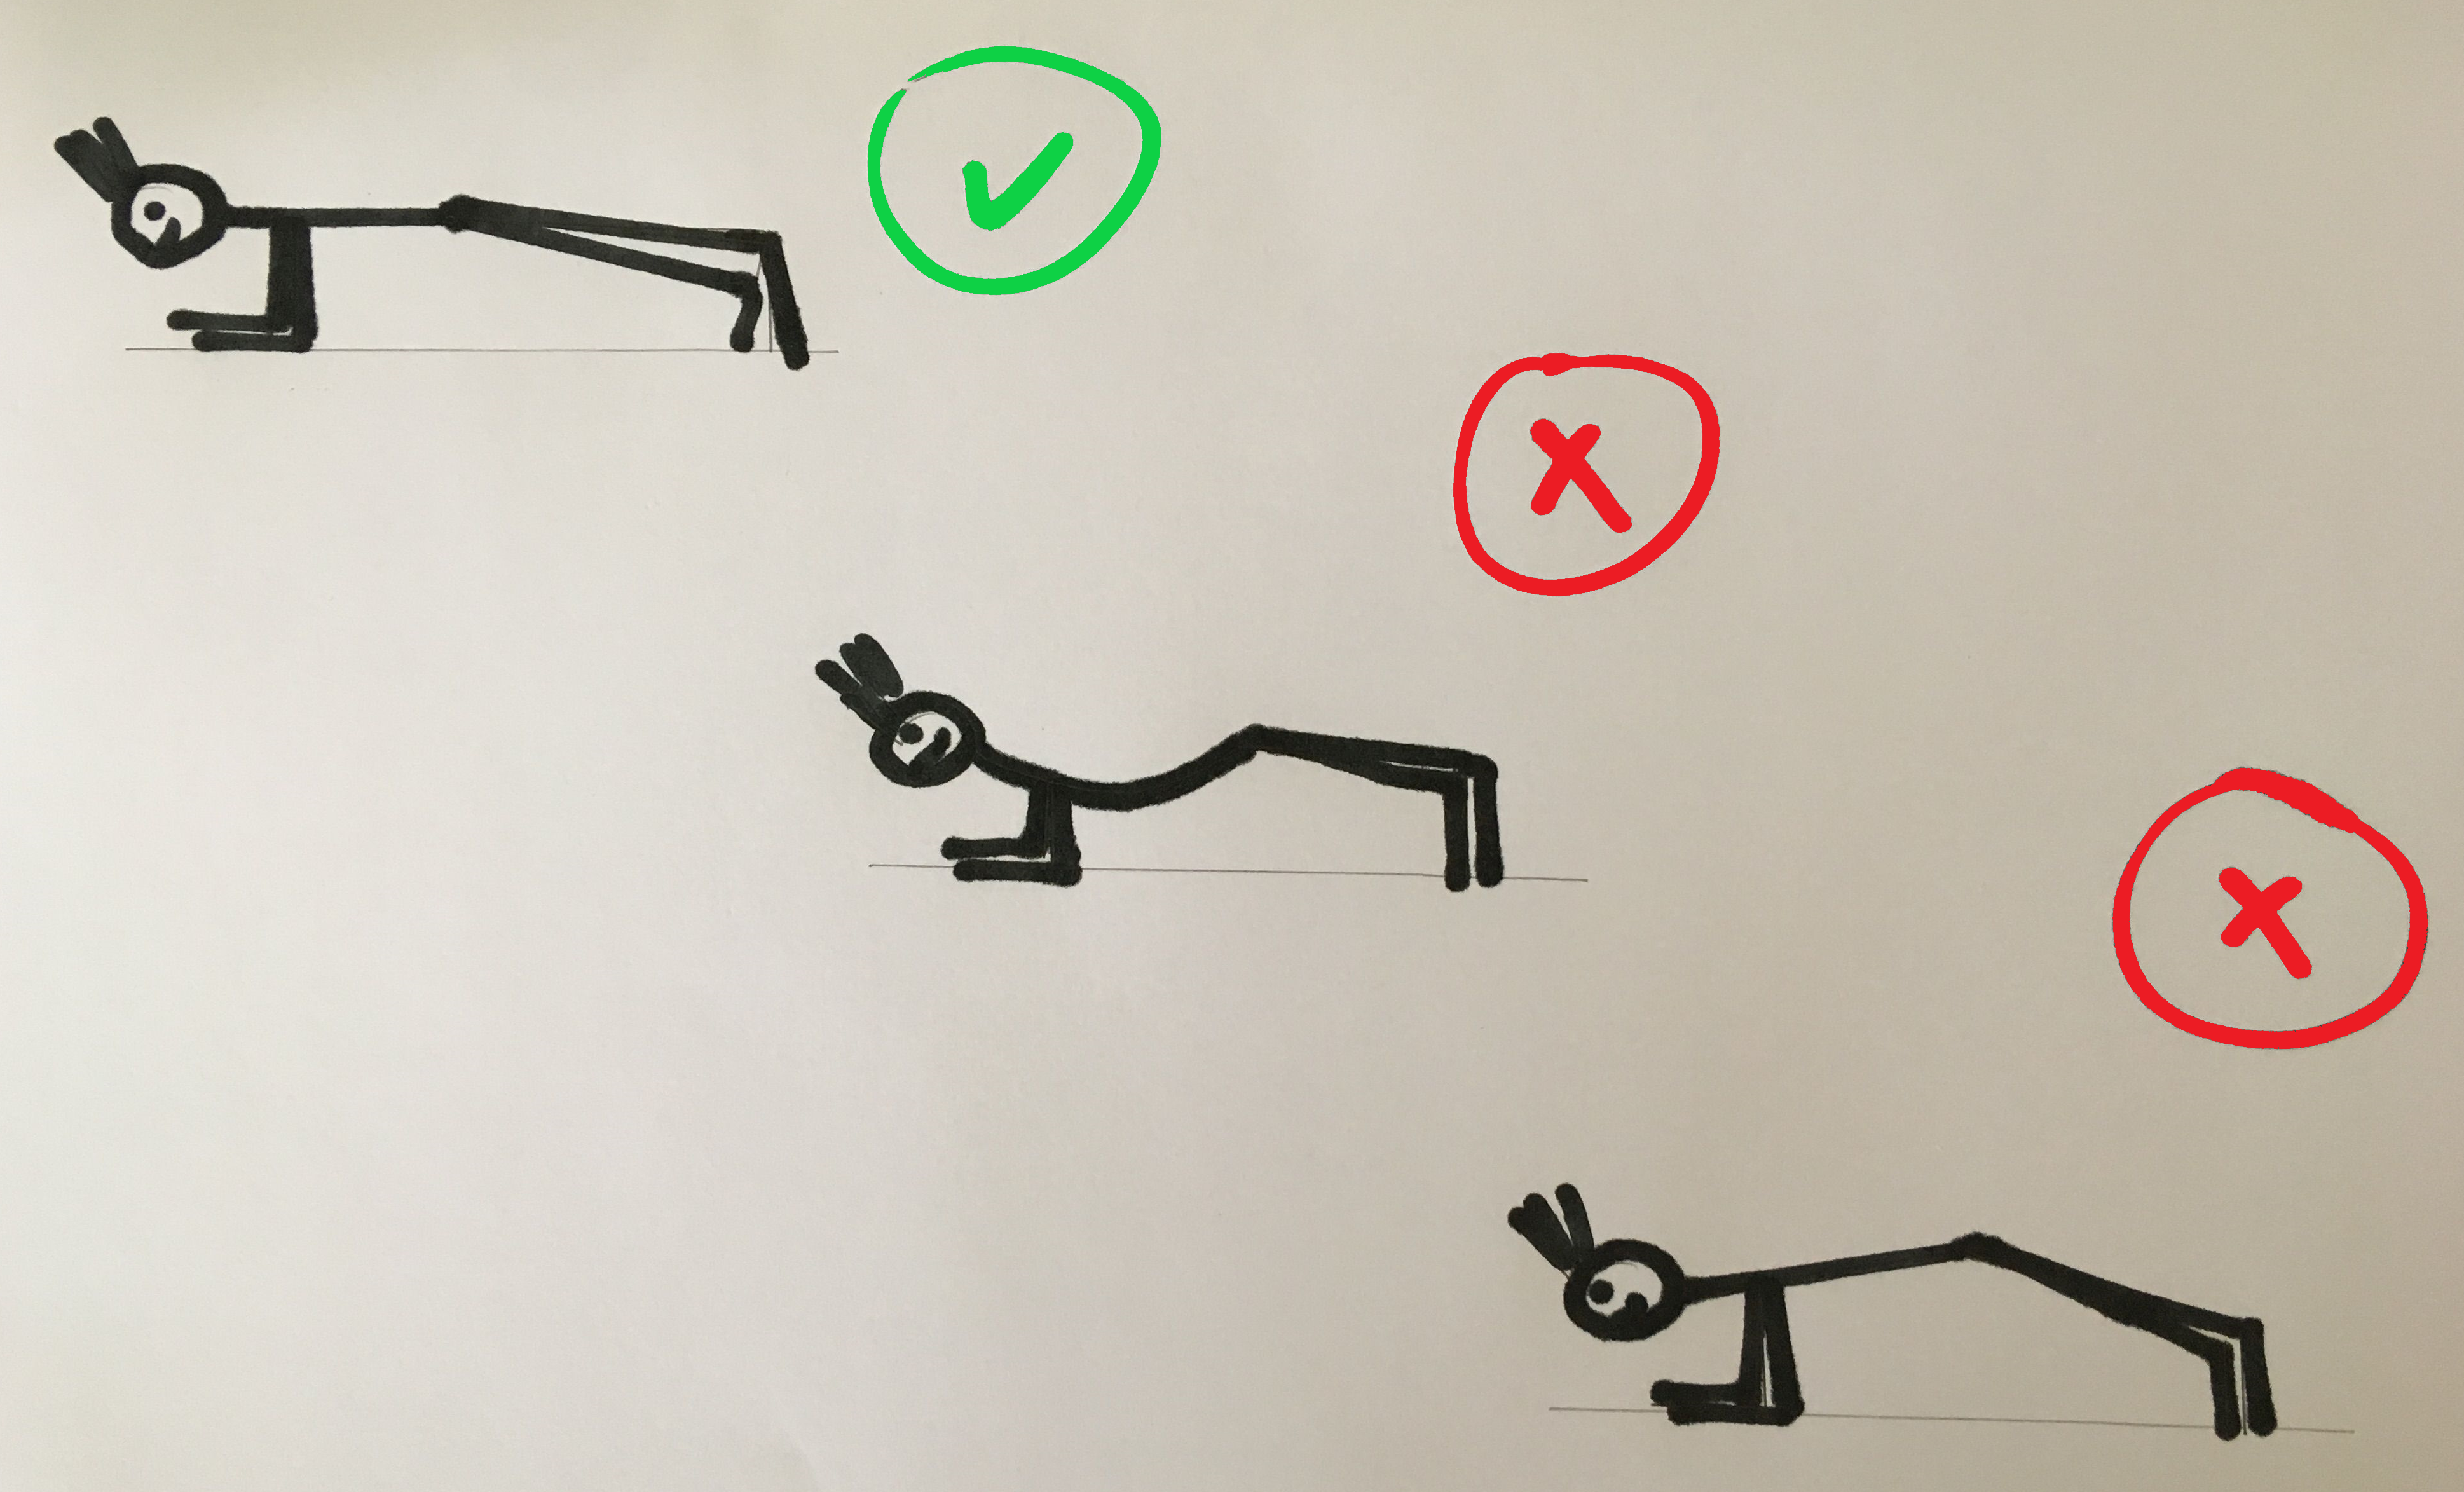
- The alpha and omega in hover is a firm belly that keeps the back straight and the booty on shoulder level. Most of us tend to push our hips upwards when it gets very strenuous, so to speak building a small “tent”. By doing so, you take away the hover’s effectiveness. But it’s much worse if you’re slacking – you can seriously injure your back. So this must not happen under any circumstances! It is therefore essential to develop a good feeling for when the hip is at the right height. That’s why I recommend to always do the hover in front of a mirror or with a training partner at least in the beginning. Tighten your bottom firmly and pull your belly button towards your spine. Your body is a straight line, from crown to heels. In hover this line runs almost parallel to the ground.
- If you exert yourself very hard, the second thing you tend to do is to make a small hump in your upper back because you pull your shoulders up towards your ears. To avoid this, you should actively pull the shoulders away from the ears. Keyword: proud breast. Try to pull the shoulders downwards and to move the shoulder blades in together (as far as possible in this position).
- Further I recommend to push the heels consciously away from yourself in order to create the feeling of extending your loooong body. This automatically activates the thighs.
The correct execution
Level 1: Hover on your knees – ideal to learn the right technique and already strengthen your core. This is particularly important for beginners.
You start lying on your belly. Put your elbows exactly under your shoulders (this means that your upper arms are at right angles to the floor) and get on your knees (knees hip-wide). Tighten your belly and your bottom firmly and check if your hips are at shoulder height. Try to remember exactly how you feel while doing this, so that at some point in the future you will be able to find this position without a training partner or mirror! As long as you are on your knees this means that your thighs are diagonal and NOT perpendicular to the ground, as they are longer than your upper arms! Hold this position and now mentally work your way top down through your body: Press your forearms actively into the ground (this activates the shoulders) – your hands are next to each other (fists or open hands) – pull your shoulders away from your ears (towards your heels) and try to tighten your shoulder blades so that you don’t have a hump. Always pull the belly button towards the spine and keep the tension in the pelvic floor. Tighten your booty firmly and activate your thighs by pushing your heels away from you. Remember, your body is a straight line, from crest to heels.
Now simply hold the hover as long as you can. Uncontrolled trembling is not uncommon, by the way, and a sign that your deep muscles are working.
Level 2: Hover on toes – for advanced players.
As soon as you have mastered the hover on your knees and are able to hold it for at least one minute, you can get on your toes (feet hip-wide or a bit wider). You just take off with your knees. Nothing else changes – make sure that you don’t automatically move up with your hips. The booty must remain at shoulder level! Now you can go back on your journey top down through your body and check all the above points as described. Again, your body forms a straight line from the crest to the heels.
The plank
Being a little less challenging than the hover, the plank can be considered its little sister. The principle is the same, with the small difference that you do not stand on your forearms, but on your hands (as for a push-up). This applies to level 1 on the knees as well as to level 2 on the toes. In both cases, this means that the hip can no longer be at shoulder level because the body would then no longer form a straight line. Your hips are now slightly lower than your shoulders and of course above your heels. I would like to repeat it again: Your body forms a straight line, this time clearly oblique in relation to the ground. 😉
Variants
For those who have perfect control of the hover and/or the plank and are able to hold for a minute or longer, there are many ways to increase the intensity – here are just a few examples. All these exercises should first be tried on the knees before going on the toes. With all variants it is also important to make sure that your hips remain at the same height (and do not move up or down) and stay parallel to the ground, you do not twist.
- You can alternately lower a knee (as if you were riding a bicycle), tap the ground lightly and then lift it up again. You can also lift and lower both knees at the same time.
- You can lift your legs alternately (lift your heel upwards or push it up and out at an angle of 45°). (This exercise can also be wonderfully combined with the first one.)
- You can alternate between outward and backward tipping of your feet (practically one step to the side and back to the middle). Or you walk one after the other with your feet outside and then back inside.
- You can jump simultaneously with both feet to the outside and back to the inside (somewhat like jumping jacks).
- In plank, the knees can be led alternately in a straight or diagonal line (or both) towards the elbows (a slow mountain climber).
- Attention, very demanding: In plank you can walk sideways. You move your arm and leg on the same side.
- Up-downs: You start in hover, get on the hands (first one hand, then the other hand) into plank and then down again to hover, again moving one arm after the other.
There are more variations – but just come up with something yourself and write your ideas in the comments if you like. Then we all get something out of it. 🙂
In summary, hover and plank are basic exercises for getting an all around strong, trained body. If you master these two moves and exercise them regularly, you will not only train your abdomen, but also your entire core, get a strong back, a good posture, prevent back problems and have a great foundation for many other sports and fitness courses. And who knows – maybe you’re one of those who can get a six-pack? Give it a FIBEEER – it surely won’t harm you. 😉
Then subscribe to our blog updates via the sidebar (in the mobile version via the + sign). If you also want to be able to comment on our posts, just register here.