During my strength training the other day, many other people in the gym first watched me with interest, then asked me what I was doing, and finally one girl even dared to join in with me.
What was I doing? Simply – I got up… lay down again… and then got up again… and lay down again afterwards…
But of course not “just like that”, but with a system. And this skipjack bunny even has an official name – it’s called the Turkish get-up!
There has been a lot written about it, but still almost nobody knows it. At least not in the gyms I usually hang out in. When my trainer decided to integrate it into my training plan, I only knew it from watching – I had never carried it out.
That was too weird for me. Kind of a little fishy. Something for the crazy ones. 😀
That’s why it makes its way into our curiosity cabinet, although, like crawling, it should actually be part of every training plan.
Because, in short, the Turkish get-up is a great functional exercise for the whole body. One trains not only strength (especially shoulders, arms, legs), but also stability (shoulders, hips, the entire core), balance and mobility (for example in the hips). Since it is always performed on one side, it is also a great exercise to reduce possible asymmetry between our sides (right-left).
It can be executed with or without additional weight. For beginners it is recommended to start without or only with very light weight, until you have absorbed the movement sequence and can keep the body well in balance.
At first glance, the Turkish get-up is a complex combination of several exercises, familiar to many athletes from functional training, which is difficult to describe – among other things, we find shoulder presses (which is why it found its way into my training plan) and lunges within it.
But let’s start from the beginning.
Step 1: You lie relaxed on your side with your legs tightened – let’s start with the left side. You hold an eventual weight, e.g. a dumbbell or a kettlebell (start small or completely without – in this case you simply clench your fist very tightly), with the lower – thus the left – hand. Now you roll on your back. Stretch your right arm (with your empty hand) to the side and your right leg out as well. With the weight in your hand, stretch your left arm high into the air, so that your hand is above your shoulder, and put your left leg up at an angle.
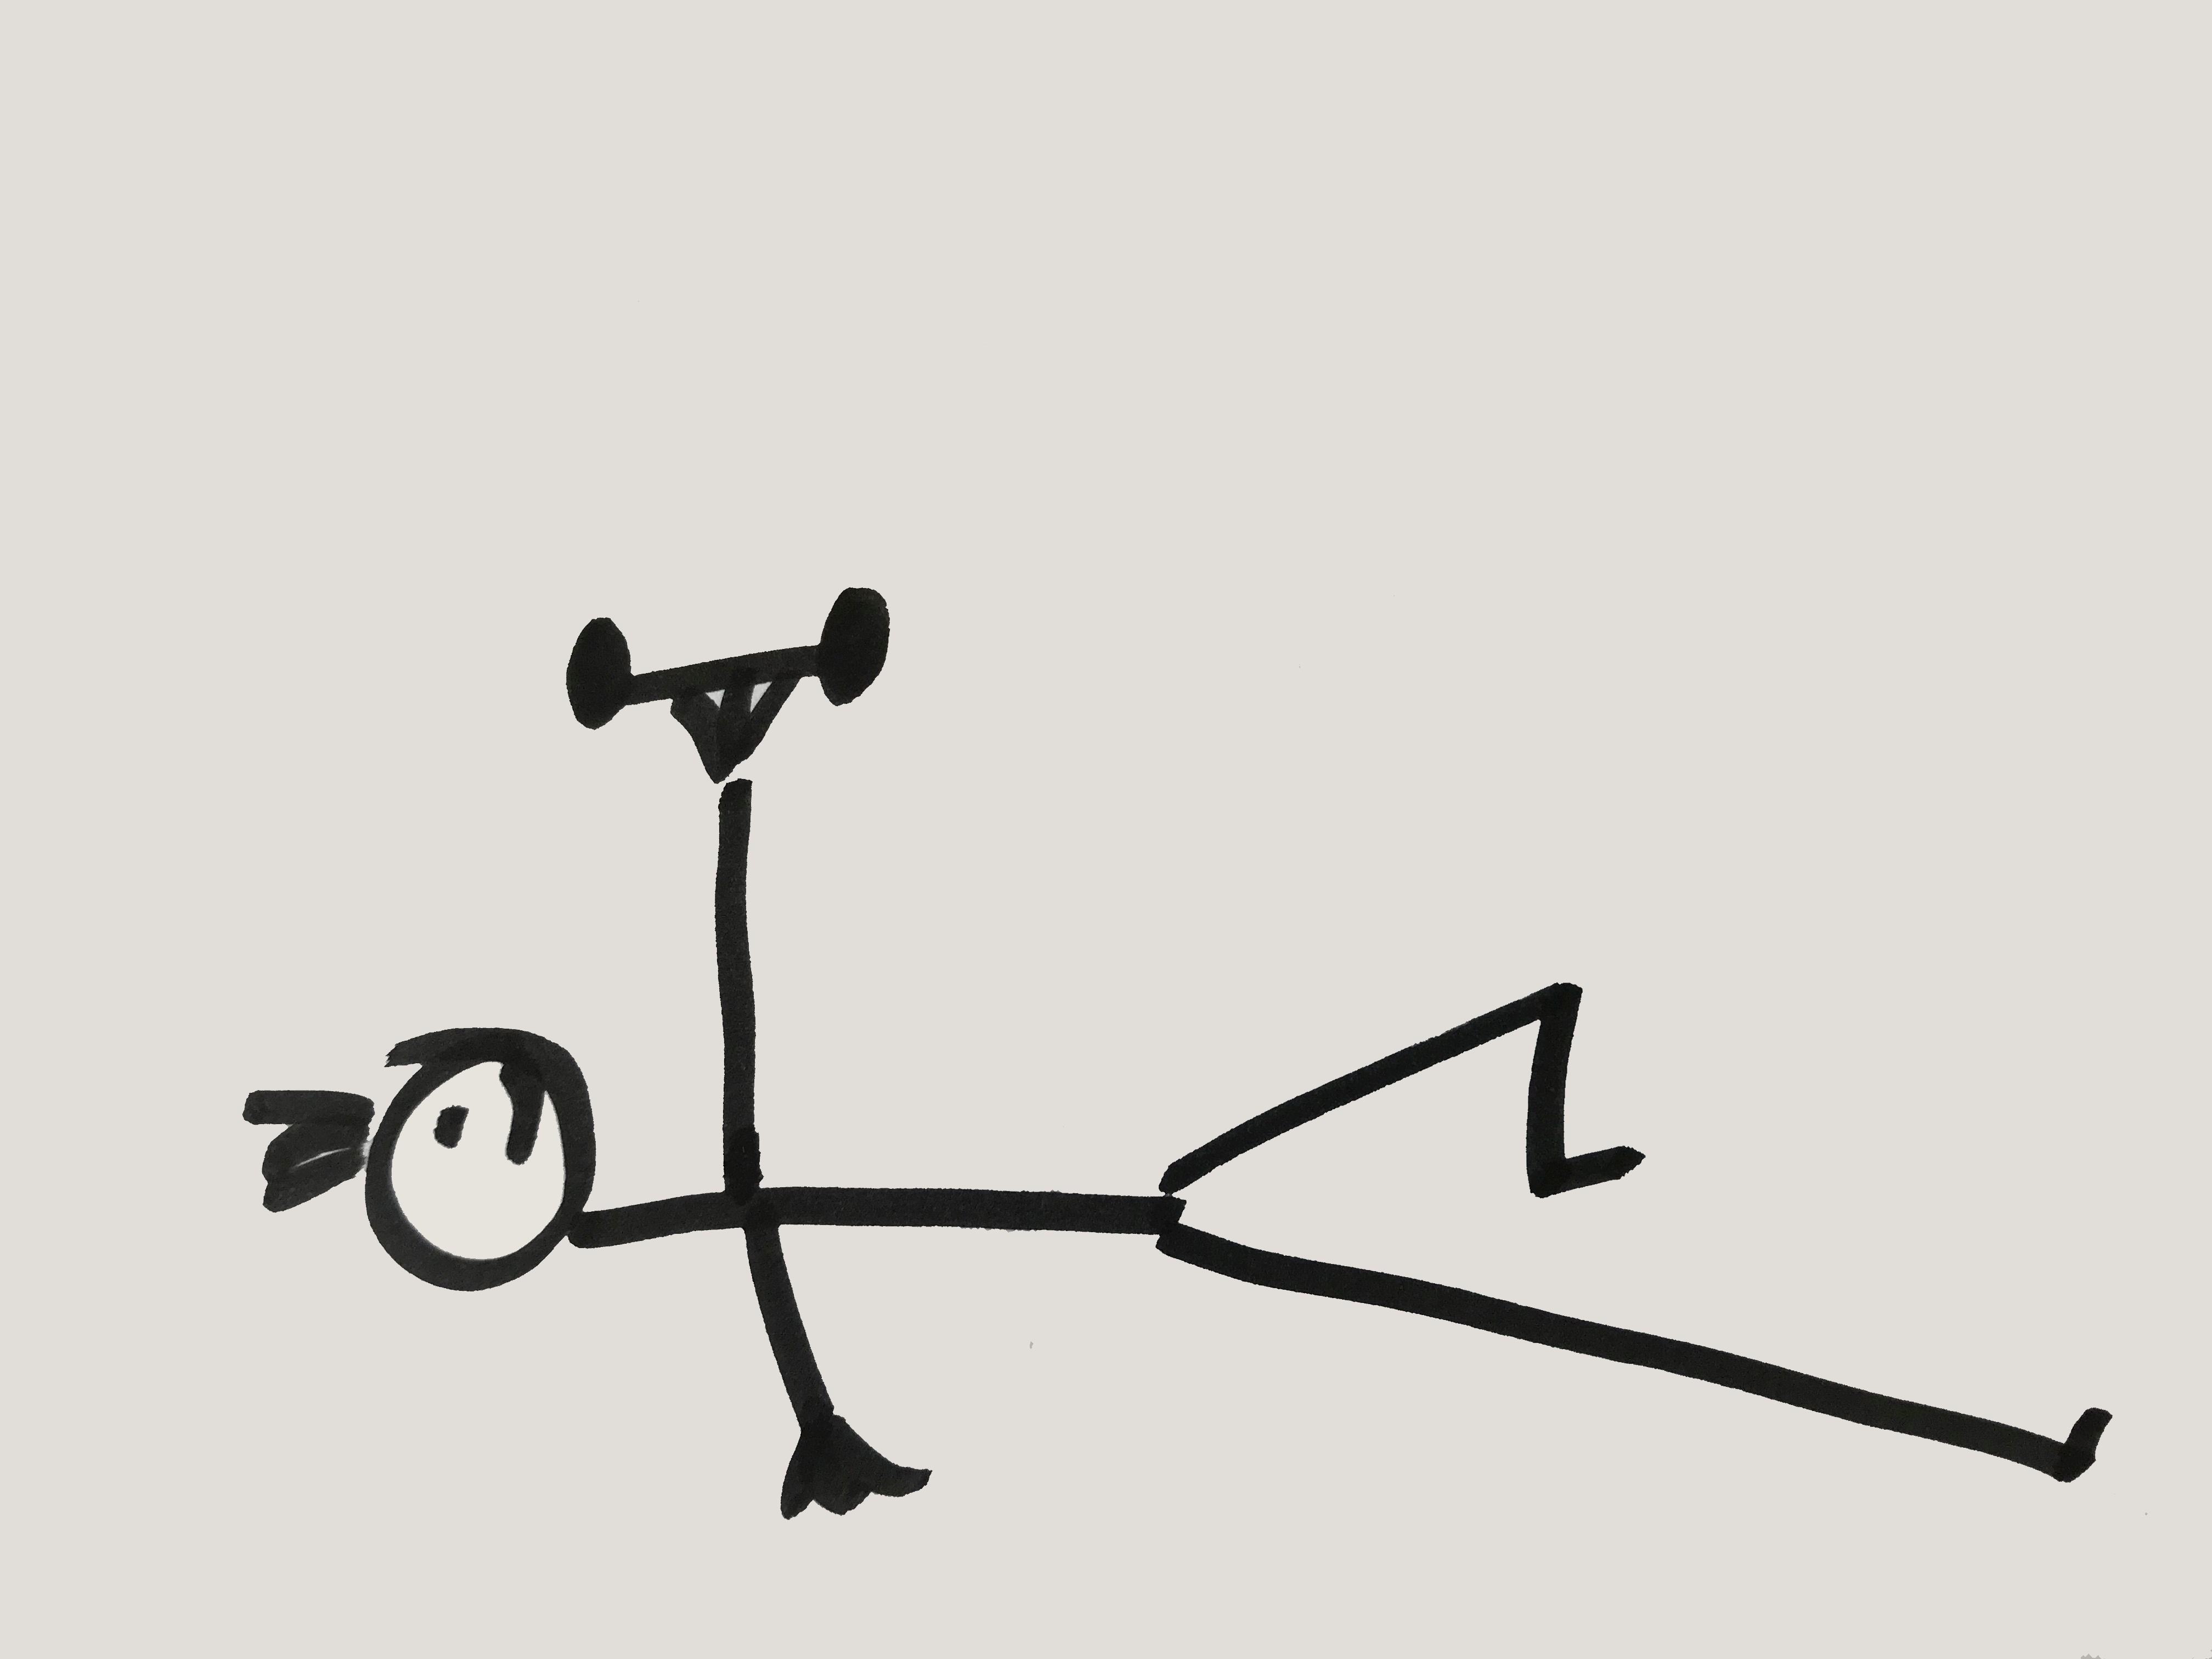
The left hand – with or without weight – remains above your left shoulder from now on, the arm remains stretched.
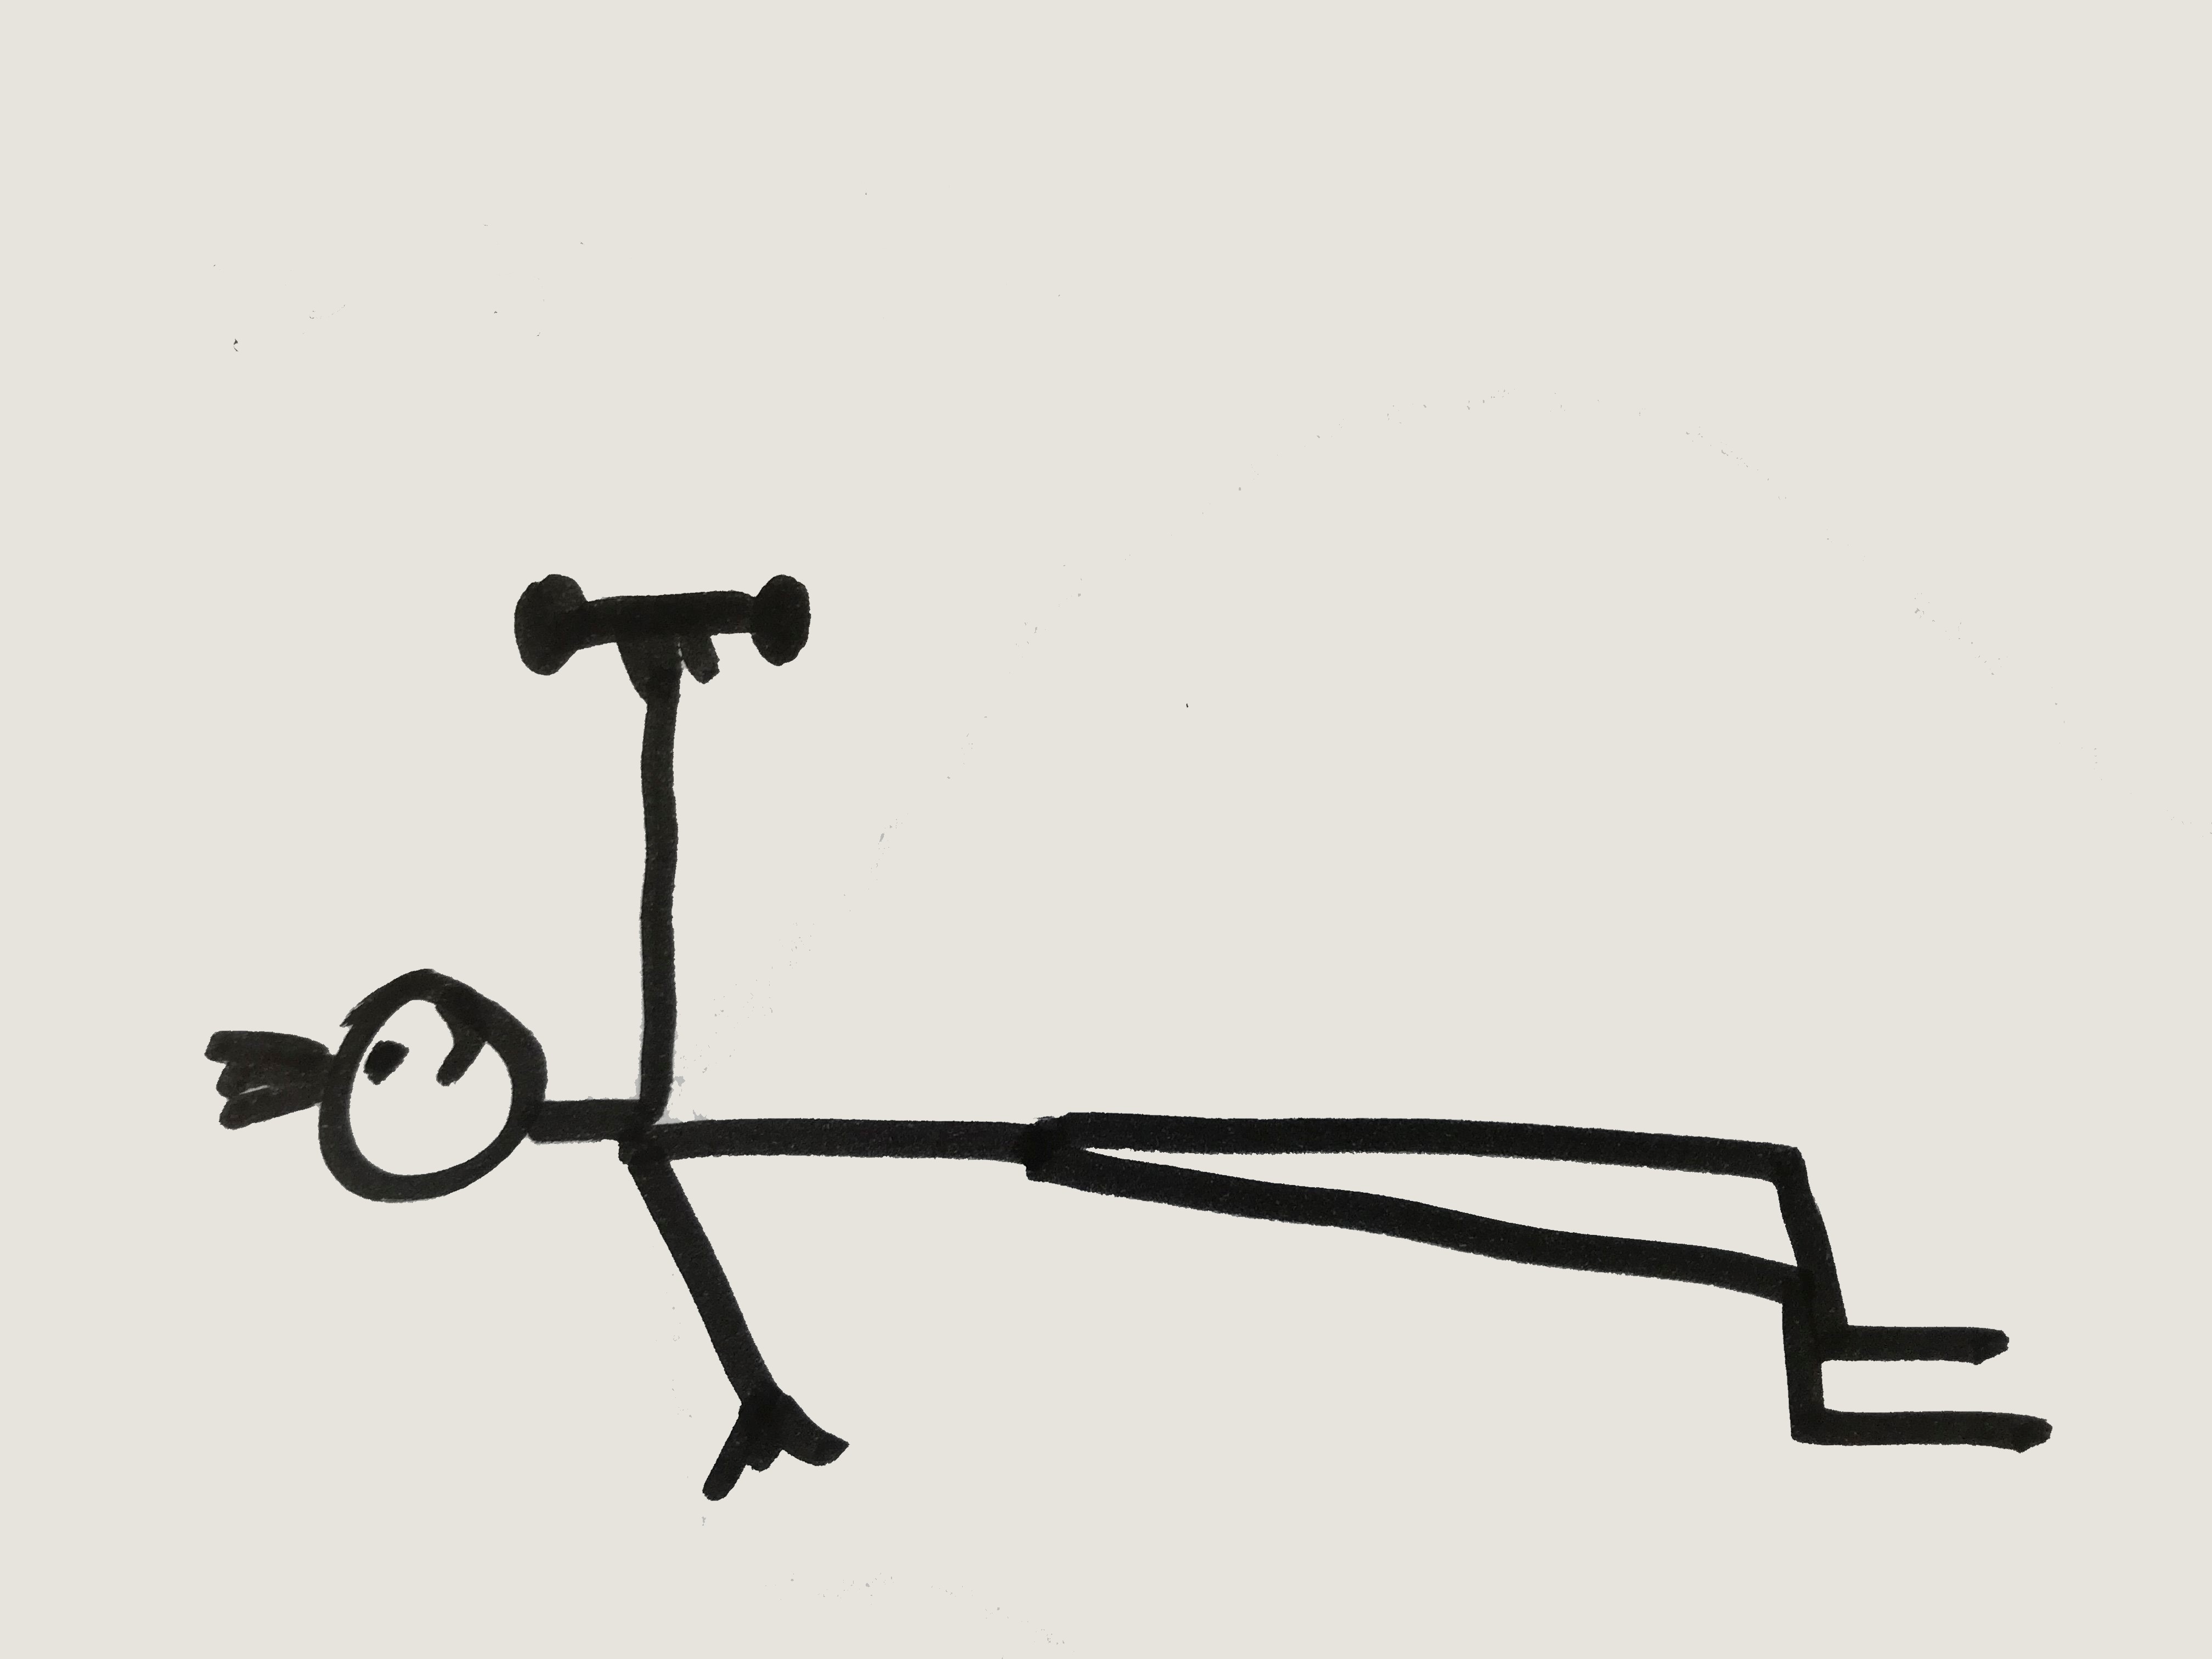
Step 2: Now turn slightly to the right side and lift your upper body off the mat (a sort of oblique crunch) to finally lean on your forearm. Then you come up on your right hand – so you sit upright, with one hand in the air and one on the ground. Stabilize your upper body, bend your right leg and now also lift your hips (move your hips straight up so that your body forms a straight line from shoulders to hips to knees). Your end position is a bridge on your two feet and your right hand.
Step 3: Shift your weight to your left foot, because now you have to bring your right knee as close as possible to your right hand. You can do this by activating your core, holding your hip as high up as possible – only then will there be enough room under your body for your leg to move – and moving your foot underneath your hip towards your shoulders. It’s a little tricky at first, but once you get the hang of it, it’s not difficult. Here the mobility of your hips and the stability of your core play an important role. If your right knee is close to or beside your right hand and stable on the floor, you can stand up: Release your hand from the floor, push your other hand, that is your left one, up towards the ceiling and align your knees and feet parallel to each other in a straight forward direction. Your end position is the “accolade position”, as I always call it: a sort of lunge, where the rear knee is on the floor. Remember to keep your left hand straight up over your shoulder.
Step 3a respectively 6a 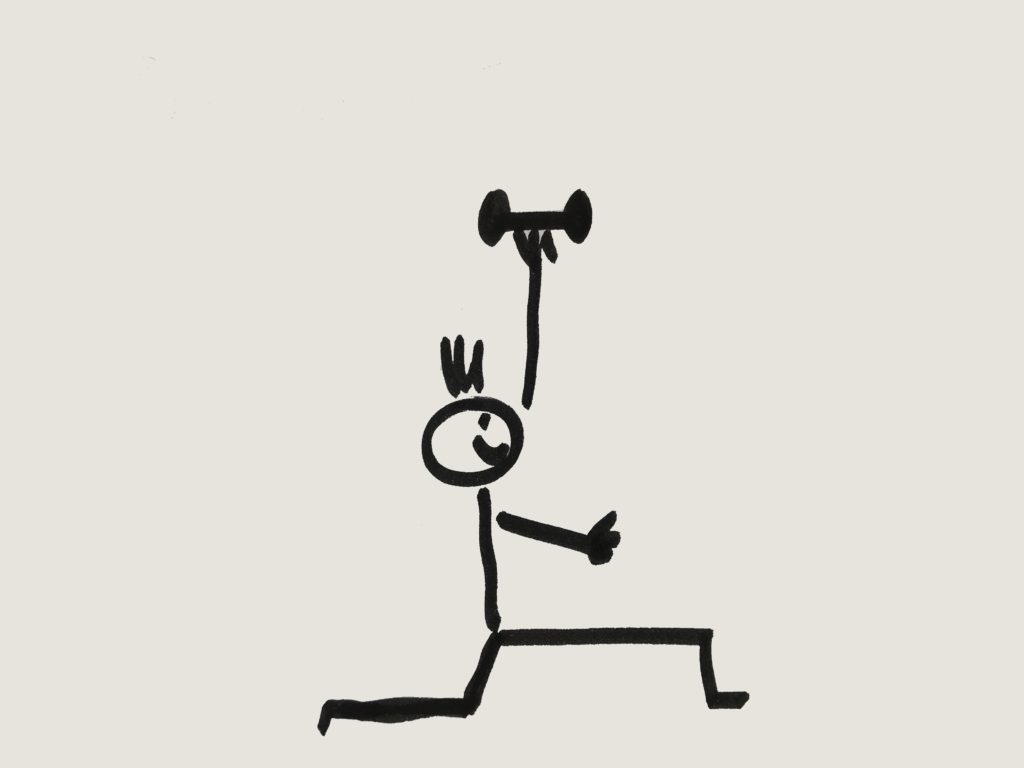
Step 3b respectively 5
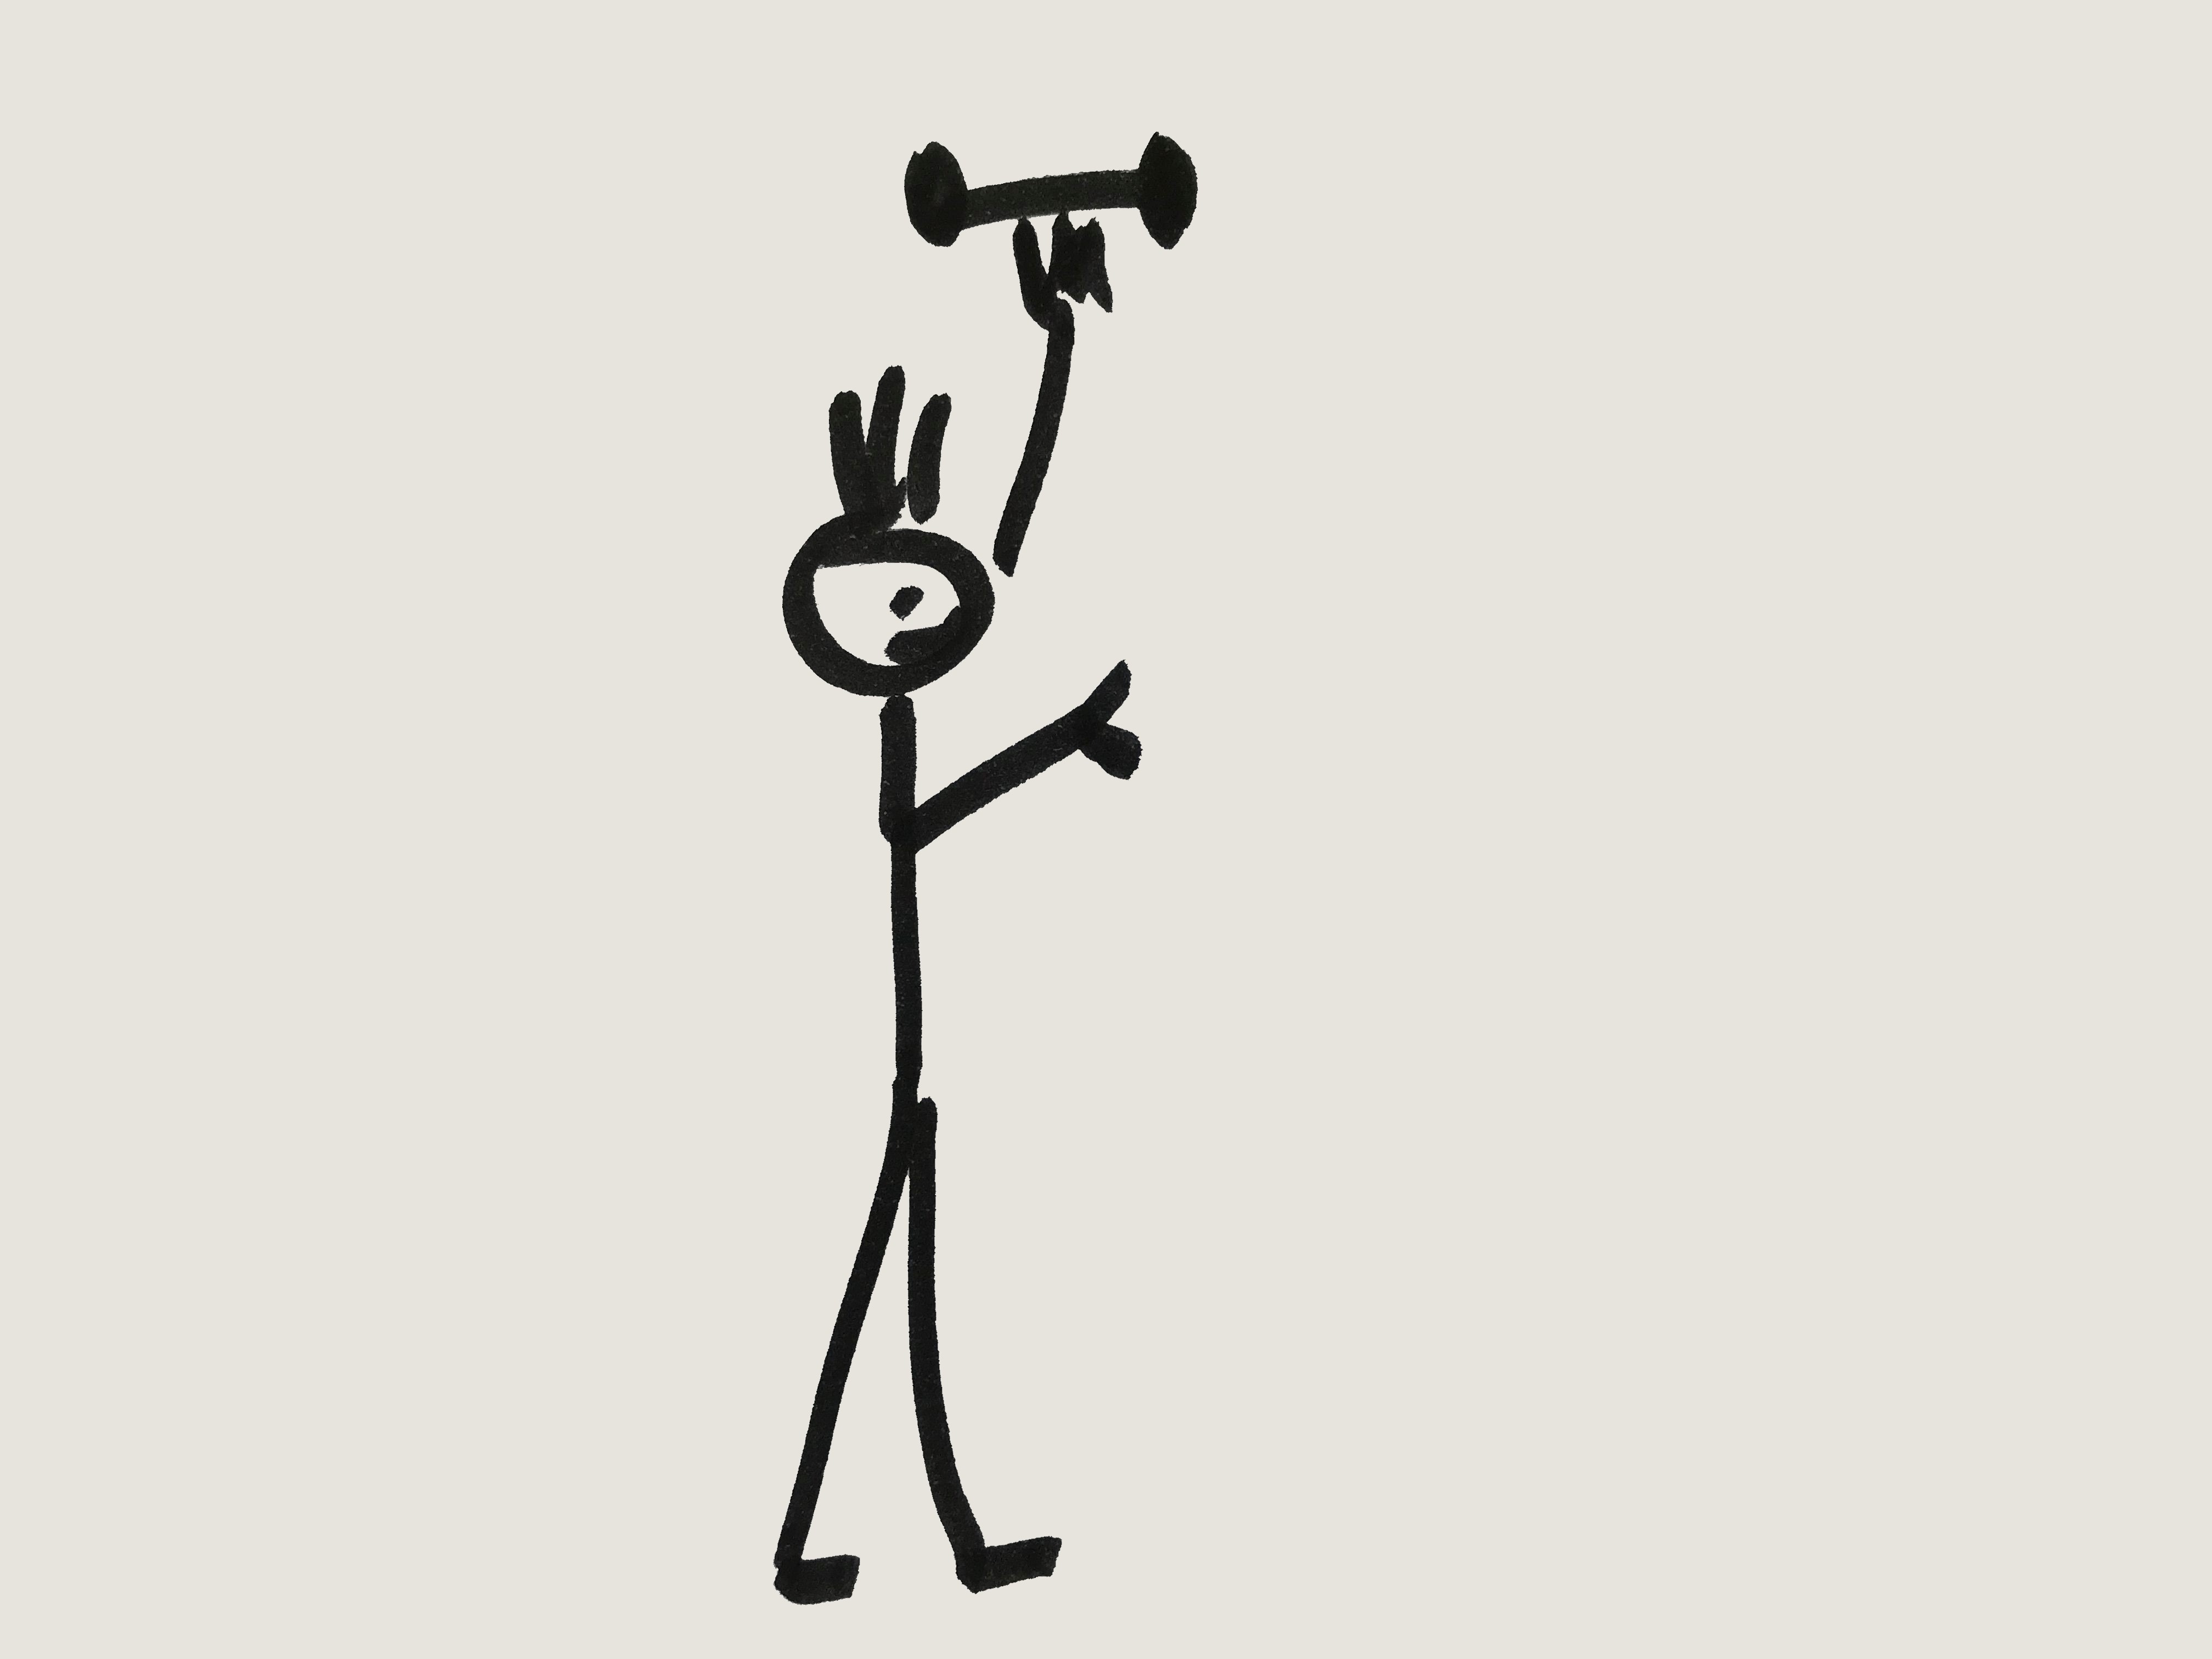
Step 4: From the lunge, push yourself up into standing, place your back foot forward, close to your left one. Stay upright.
Half time!
You got up successfully and did half the exercise! Now the whole thing upside down until you’re back on the floor lying on your side.
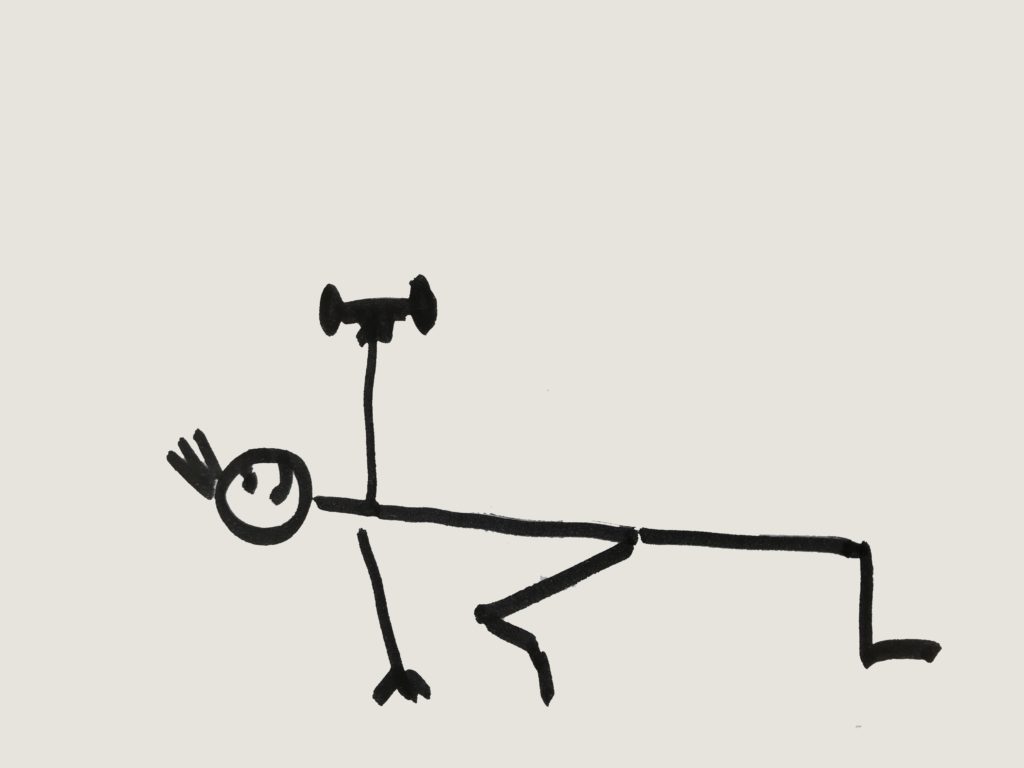
Step 5: Keeping the upper body upright, lunge your right foot backwards and bring your knee to the ground.
Step 6: Now – in a controlled manner and with a lot of tension in the core – bring your right (free) hand sideways and back on the floor, pull your rear knee and foot forward underneath your body towards your left foot, so that you return into the bridge position (both feet, right hand, shoulder-hip-knee on one line).
Step 7: First sit down, then slowly roll down into the lying position, supporting yourself with your right forearm and finally stretching your right leg and right arm all the way back.
Up to this point, the left hand with or without weight always remains above your left shoulder, the arm remains stretched.
Step 8: Pull on the right leg, grab the weight now with both hands to lower it to the chest and then turn to the side – but this time to the other side, the right side, so that we can do the whole thing again with the other hand. 🙂
Repeat steps 1-8 with the other side.
Since unfortunately I am no Michelangelo, here is the whole thing on video, as well – just to be on the safe side:
Got it? 😉
My trainer prescribed two sets each with five Turkish get-ups per side – thus a total of 20 reps. And that’s absolutely adequate. Already from the second session on I was able to increase my weight carefully – always so far that I just managed my 20 repetitions. 🙂
The Turkish get-up is one of the few strength exercises in which the heart rate gets a little higher, once you have mastered the sequence of movements and can perform several of them fluently one after the other.
… Now why is it called Turkish get-up?
According to the Internet: Because 200 years ago it was already an important part of Turkish wrestler training. At that time they already knew what is FIBER for the body.
Then subscribe to our blog updates via the sidebar (in the mobile version via the + sign). If you also want to be able to comment on our posts, just register here.